Water is one of the most destructive forces in a residential setting. A single pinhole leak, an improperly seated washer, or a loose fitting can release hundreds of gallons of water in a matter of hours, leading to structural rot, ruined subfloors, and hazardous mold growth. While home improvement projects like updating a bathroom or replacing a kitchen fixture are exciting ways to add value and comfort to your home, they also carry inherent risks. Plumbing systems operate under continuous pressure, and even minor mistakes during installation or maintenance can result in sudden, catastrophic flooding.
Successfully managing home plumbing projects requires a balance of careful planning, precision execution, and a clear understanding of your system’s operational mechanics. By mastering the basics of system shut-offs, adhering to strict joint-sealing standards, protecting high-risk appliances, and maintaining clean drainage pathways, homeowners can complete renovations safely while minimizing the risk of hidden leaks. This comprehensive guide provides actionable strategies to keep your water where it belongs—inside the pipes.
Master the Fundamentals of Plumbing Project Planning and Preparation

Every successful plumbing project begins long before a wrench touches a pipe. Proper preparation involves understanding how your home’s water distribution system functions and taking precise measurements to prevent unexpected equipment failure. Before cutting into any existing line, you must verify the location and operational status of your home’s main water shut-off valve as well as individual fixture stop valves. Test these valves in advance; older gate valves can seize over time, leaving you unable to turn off the water in an emergency.
Water pressure is another critical factor that homeowners frequently overlook. Household municipal supply lines should ideally operate between 40 and 60 pounds per square inch. Water pressure exceeding 80 pounds per square inch exerts excessive mechanical stress on pipe joints, appliance valves, and flexible supply lines, dramatically increasing the likelihood of pinhole leaks and burst fittings. Installing a simple, inexpensive pressure gauge on an outdoor hose bib allows you to monitor your pressure; if it reads high, installing or replacing a pressure-reducing valve at the main supply line is an essential first step.
Your pre-project preparation routine should focus on testing main shut-off valves and localized fixture stops for complete closure, measuring incoming static water pressure with a hose-bib gauge, identifying existing pipe materials like copper, PEX, PVC, or galvanized iron, and verifying compatible transition fittings to prevent galvanic corrosion.
Material compatibility is equally vital when planning repairs or additions. Joining dissimilar metals, such as connecting copper directly to galvanized steel, triggers galvanic corrosion—an electrochemical reaction that rapidly degrades the pipe threads and leads to slow, hidden leaks behind walls. Always use dielectric unions or brass transition fittings when bridging different metal types.
Consulting with local residential plumbers during the initial design phase of a major renovation helps ensure that your planned pipe routes, drainage slopes, and venting schemes comply with regional building codes. When facing complex layouts that involve structural wall modifications or main stack realignments, handing off the rough-in phase to experienced local plumbing contractors ensures that your home’s infrastructure is built to withstand decades of daily use.
Moreover, collaborating with skilled plumbers can provide valuable insights into energy-efficient systems and innovative technologies that can enhance your home’s functionality. They can also identify potential challenges early on, saving you both time and money in the long run. By prioritizing expert advice during the planning stages, you lay a solid foundation for a successful renovation that meets both your aesthetic goals and practical needs.
Adopt Professional Joint-Sealing and Fitting Standards
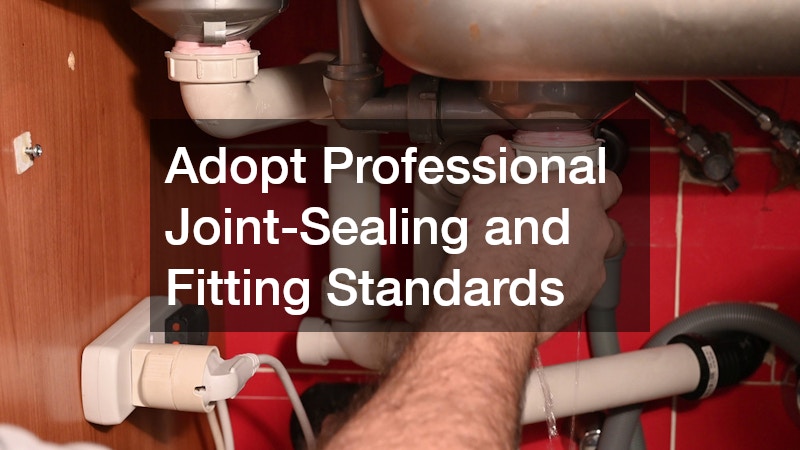
The connections between pipes and fittings represent the most vulnerable points in any plumbing system. Creating a watertight seal requires specific techniques depending on the pipe material and joinery method being utilized. Skimping on preparation or using incorrect sealing compounds is the leading cause of post-installation leaks.
For threaded iron or plastic connections, always use a combination of polytetrafluoroethylene tape and non-hardening pipe joint compound. Wrap the tape clockwise around the male threads—the same direction the fitting turns—so it does not unravel as you thread the joint together. Apply two to three wraps of tape, followed by a thin, even coat of pipe dope over the tape to fill microscopic gaps in the threads.
Proper joint assembly guidelines require specific steps for each material type: wrap threaded joints clockwise with tape and overlay with joint compound, clean copper pipe ends to bright metal and apply non-acid flux before soldering, align tubing squarely on compression fittings to avoid over-torquing the nut, and deburr cut pipe edges on push-to-connect fittings to prevent tearing internal rubber O-rings.
Soldering copper pipes demands clean surfaces and precise temperature control. Clean the exterior of the pipe end and the interior of the fitting socket with emery cloth or a wire brush until the metal shines. Apply a thin layer of flux immediately to prevent oxidation. Heat the fitting evenly with a torch, applying solder to the joint opposite the flame; thermal action will pull the molten solder smoothly into the joint gap through capillary action. Allow the joint to cool completely without movement to prevent cold joints, which crack easily under stress.
Mastering these core assembly methods prevents the frustration of starting over due to dripping connections. Understanding when to apply specialized plumbing repair methods ensures that small drips are addressed immediately before water saturates nearby subflooring. Homeowners who want absolute certainty regarding their work can hire professional plumbing services to perform hydrostatic pressure tests on exposed supply lines prior to closing up drywall.
Manage High-Risk Appliances and Hot Water Systems
Household appliances that connect directly to your water supply—such as water heaters, washing machines, dishwashers, and refrigerator ice makers—account for a massive percentage of residential indoor flooding events. These appliances utilize flexible connection lines and internal valves that operate under constant pressure, making them prime candidates for catastrophic failure if neglected.
Replace old, rigid plastic or plain rubber supply lines with braided stainless steel hoses. Rubber hoses degrade over time due to heat, water pressure fluctuations, and ozone exposure, often bursting without warning. Braided stainless steel lines enclose an internal tubing core within a woven steel mesh jacket, preventing the inner line from expanding and bursting under pressure spikes.
Key appliance safety protocols include replacing rubber appliance hoses with braided stainless steel lines every five years, installing secondary drain pans under water heaters and washing machines, verifying that thermal expansion tank air pressure matches incoming household water pressure, and placing wireless leak detectors on the floor beneath high-risk water connections.
Water heaters require special attention due to the phenomenon of thermal expansion. When water is heated inside a closed tank system, it expands, increasing volume and pressure within the plumbing network. Without a functioning expansion tank installed above the water heater, this recurring pressure spike forces water out of the temperature and pressure relief valve or degrades internal seals across all connected fixtures.
Recognizing early warning signs—such as unusual popping noises, rust-tinted water, or erratic temperature delivery—helps you determine when to schedule professional water heater repair before the tank fails completely. Establishing an ongoing relationship with a certified plumbing company ensures that high-volume appliances are inspected regularly and installed with the proper safety features, including automated shut-off valves and overflow pans.
Maintain Clear Drainage Pathways to Prevent Backups and Joint Strain
While supply lines bring pressurized water into your home, the drainage, waste, and vent system relies on gravity to carry wastewater away. Drainage failures often cause localized flooding and sewer backups, which pose serious health risks and cause extensive structural damage. Maintaining clear, properly sloped waste lines is just as important as securing your supply pipes.
Horizontal drainage pipes must maintain a consistent slope—typically one-quarter inch of drop per linear foot of pipe run. If the slope is too flat, wastewater slows down, allowing solid debris and grease to settle and form blockages. Conversely, if the slope is too steep, liquid drains too quickly, leaving solid materials behind to build up over time. Ensure that drain lines are firmly supported with pipe hangers every four feet to prevent sagging, which creates low spots that trap debris.
Core drainage protection principles dictate maintaining a consistent slope of one-quarter inch per foot on horizontal drain lines, securing waste lines with hangers every four feet to eliminate sagging, keeping roof vent stacks clear of leaves, bird nests, and ice buildup, and strictly avoiding pouring grease, oil, or fibrous food waste down household drains.
Chemical drain cleaners are often marketed as quick fixes for slow drains, but they pose significant risks to your piping infrastructure. Most chemical cleaners rely on caustic compounds that generate heat to dissolve clogs. This chemical heat can warp thin PVC drain lines, degrade rubber washers, and corrode cast-iron or copper waste pipes, leading to hidden leaks inside walls or under cabinets. Use mechanical drain augers or enzymatic cleaners to remove blockages safely.
Investing in routine, professional drain cleaning clears accumulated grease, hair, and mineral scale from main lines before partial clogs turn into total backups. When dealing with persistent underground blockages caused by tree root intrusion or misaligned pipe segments, hiring a skilled plumbing contractor to conduct a video camera inspection identifies the exact location and nature of the problem without unnecessary excavation.
Plan for Structural Modifications and Emergency Contingency Protocols
When home projects involve opening walls or floors, routing new pipes safely requires protecting them from future structural damage. Fasteners used during drywall installation, baseboard mounting, or floor tile installation can easily puncture supply and waste lines if those pipes are not positioned correctly within wall studs and floor joists.
When drilling holes through wood studs to route pipes, center the hole within the stud so that at least one and a quarter inches of wood remains between the edge of the pipe and the face of the stud. Wherever a pipe passes through a stud closer than one and a quarter inches to the edge, install heavy-gauge steel nail guard plates on the face of the stud. These plates prevent drywall screws and finish nails from penetrating the pipe.
Essential emergency contingency measures include installing heavy steel nail guard plates over all wall studs containing pipes, keeping specialized pipe repair clamps and rubber patches in your toolbox, labeling all main and branch shut-off valves with high-visibility tags, and maintaining a list of licensed emergency contacts near your main water meter.
Even with careful planning, emergencies can occur. Creating an emergency mitigation plan minimizes water damage during a crisis. Ensure everyone in your household knows how to locate and operate the main water valve. Store emergency tools—such as a meter key, pipe repair clamps, self-fusing silicone tape, and bucket sets—in a dedicated, easily accessible spot.
Adhering to strict new construction plumbing standards during major home remodels guarantees that hidden wall assemblies are properly fire-stopped, insulated against freezing, and protected from mechanical punctures. Additionally, it ensures that your plumbing is up to date and compliant with current safety regulations, reducing the risk of future issues.
Finally, keeping the contact information of a dependable 24/7 emergency plumber prominently displayed near your main shut-off valve gives you instant access to immediate professional help when an unexpected leak threatens your property. Regular maintenance checks and timely repairs can also go a long way in prolonging the life of your plumbing system and preventing significant water damage. Being proactive and prepared can save you both time and money in the long run.
Conclusion
Managing home plumbing projects successfully requires a methodical approach that prioritizes precision, safety, and thorough preparation. By taking the time to test shut-off valves, control water pressure, master joint-sealing techniques, protect high-risk appliances, and maintain clear drainage lines, homeowners can confidently undertake renovations while protecting their properties from devastating water damage.
The cost of preventative measures, quality materials, and expert guidance is minimal compared to the expense of remediation and structural repairs following a major leak. Taking a proactive stance on plumbing health ensures that your system operates quietly, efficiently, and reliably for years to come. Inspect your shut-off valves today, verify your household water pressure, and plan your next home project with safety and leak prevention as your top priorities.